AppsAnywhere
AppsAnywhere gets you access to course software.
Western Engineering students and faculty can access licensed software applications with any device, from anywhere, at any time.
You can access AppsAnywhere from appsanywhere.eng.uwo.ca
If you want to access software using AppsAnywhere then you will need Cloudpaging Player installed. This is already installed on all Engineering managed PCs and laptops.
If you are using a personal device, you will need to manually install Cloudpaging Player.
AppsAnywhere Help
Installing Cloudpaging Player
Step 1
- Visit appsanywhere.eng.uwo.ca
- If required, log in using Western WebLogin.
Step 2
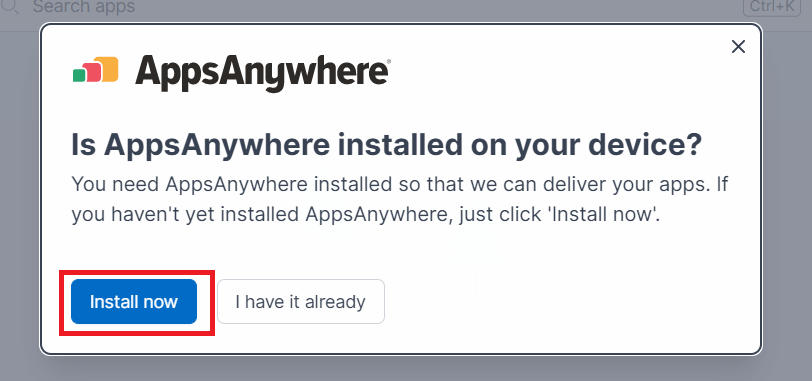
- Click 'Install now' to install Cloudpaging Player.
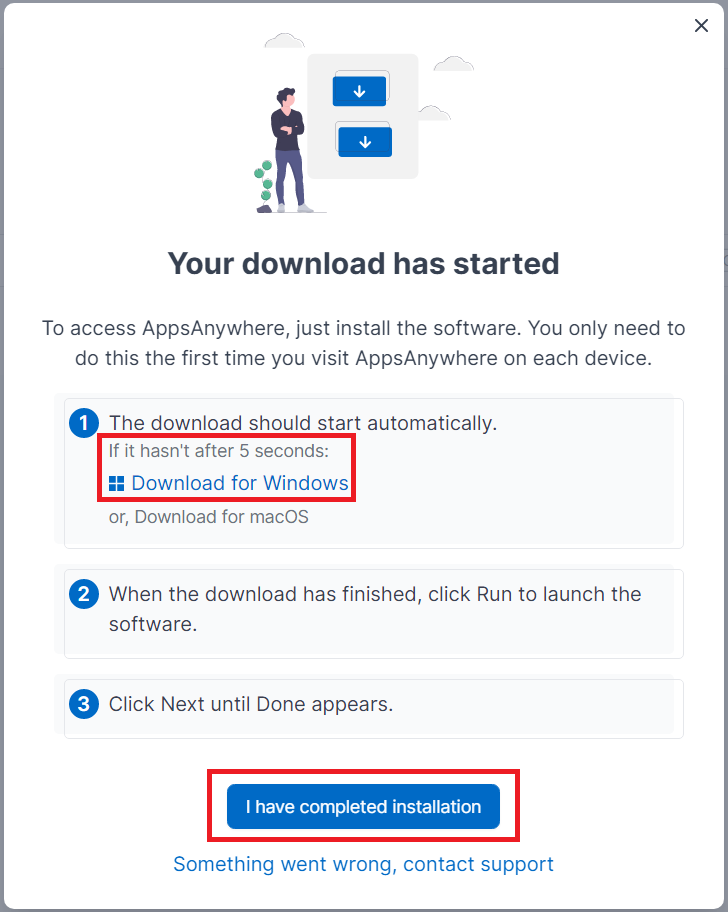
- The download should start automatically. If the download hasn't after 5 seconds, see the Download link in the above screenshot.

- When the download has finished, go to your Downloads folder and click AppsAnywhere set up file to install the Cloudpaging Player.
- Only click 'I have completed installation' once the installation has been completed.
Step 3
- See the AppsAnywhere installer in the below screenshots.
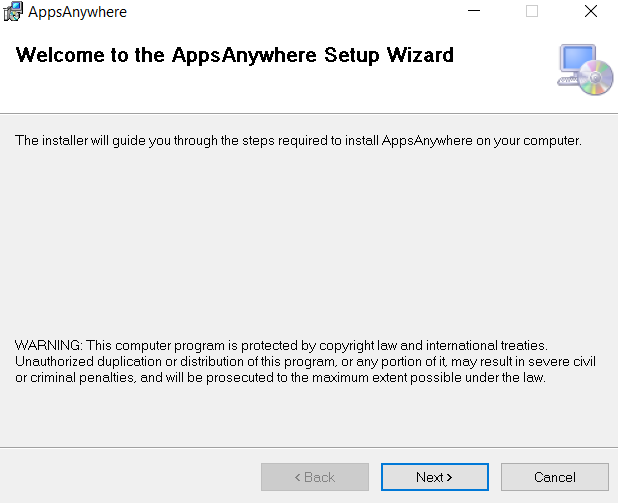
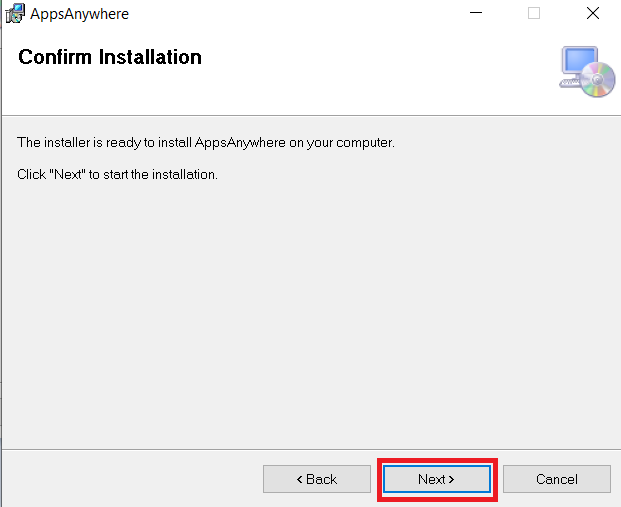
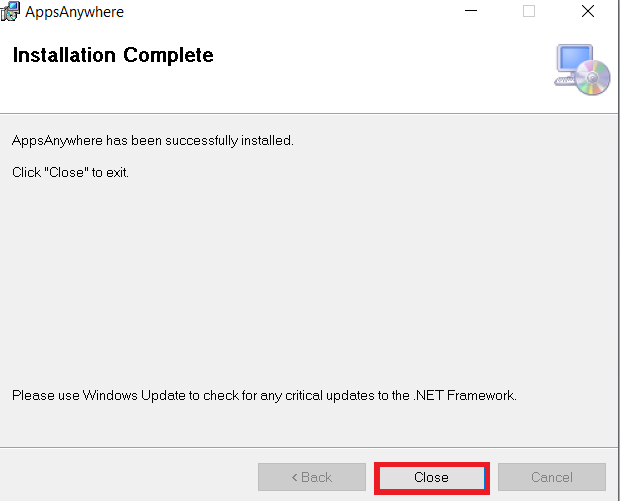
- Click "Close" to complete installation.
Step 4

- After the Cloudpaging Player installation has been completed, click 'I have completed installation'.
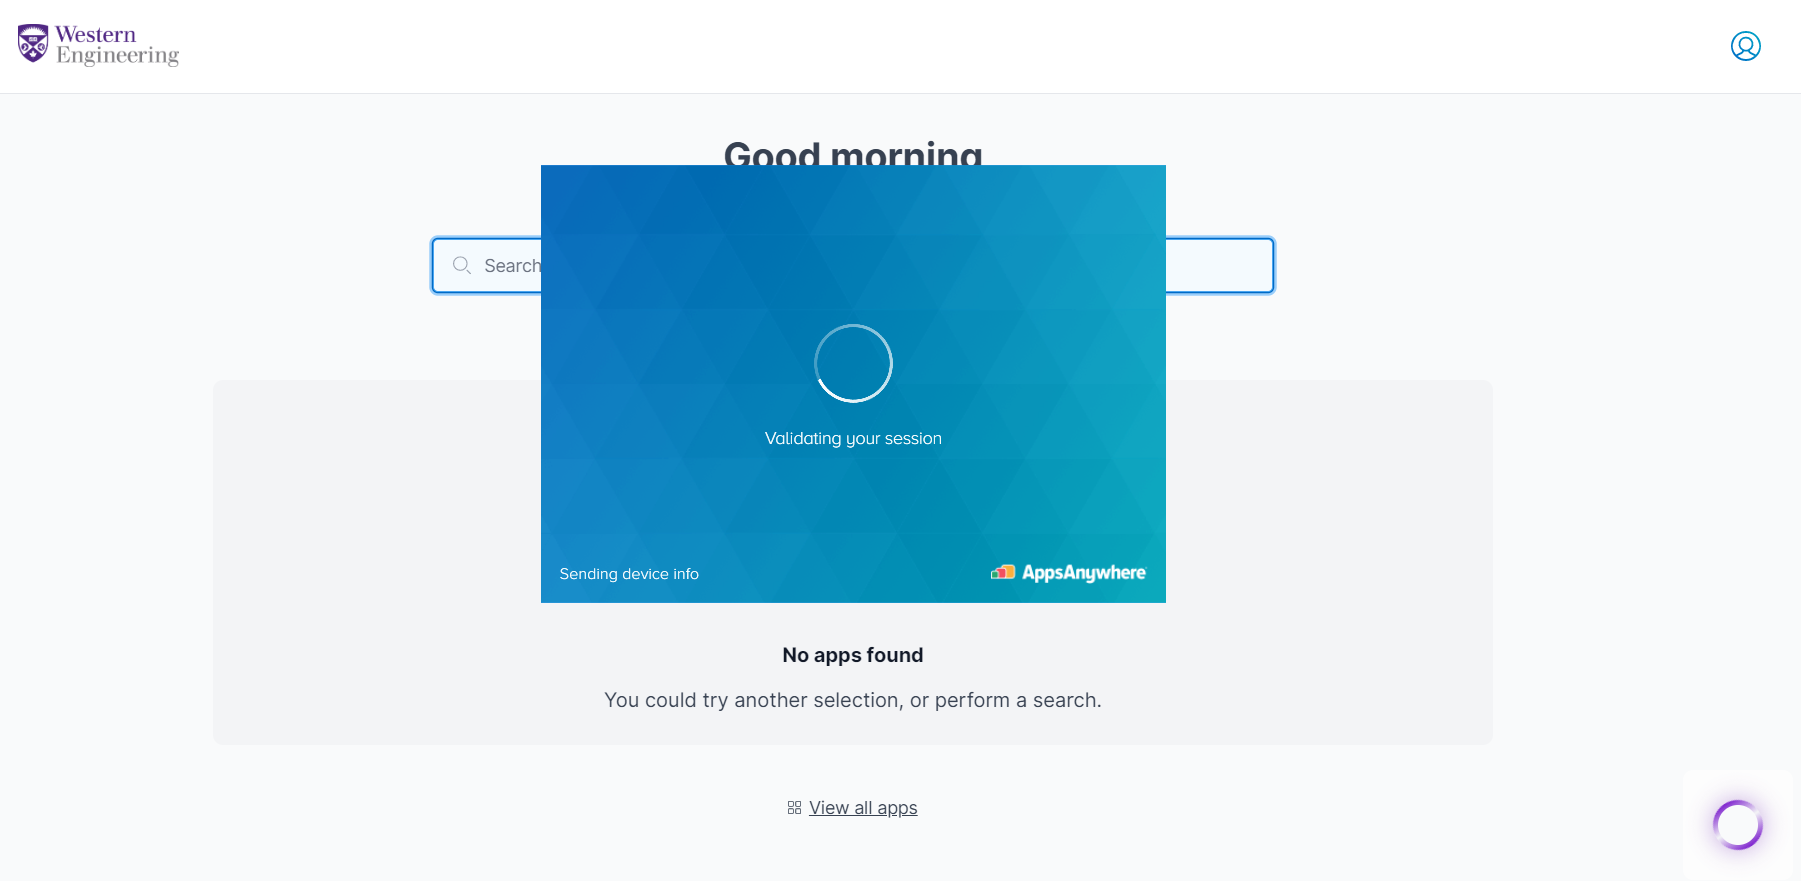
- Then validating your session will begin.
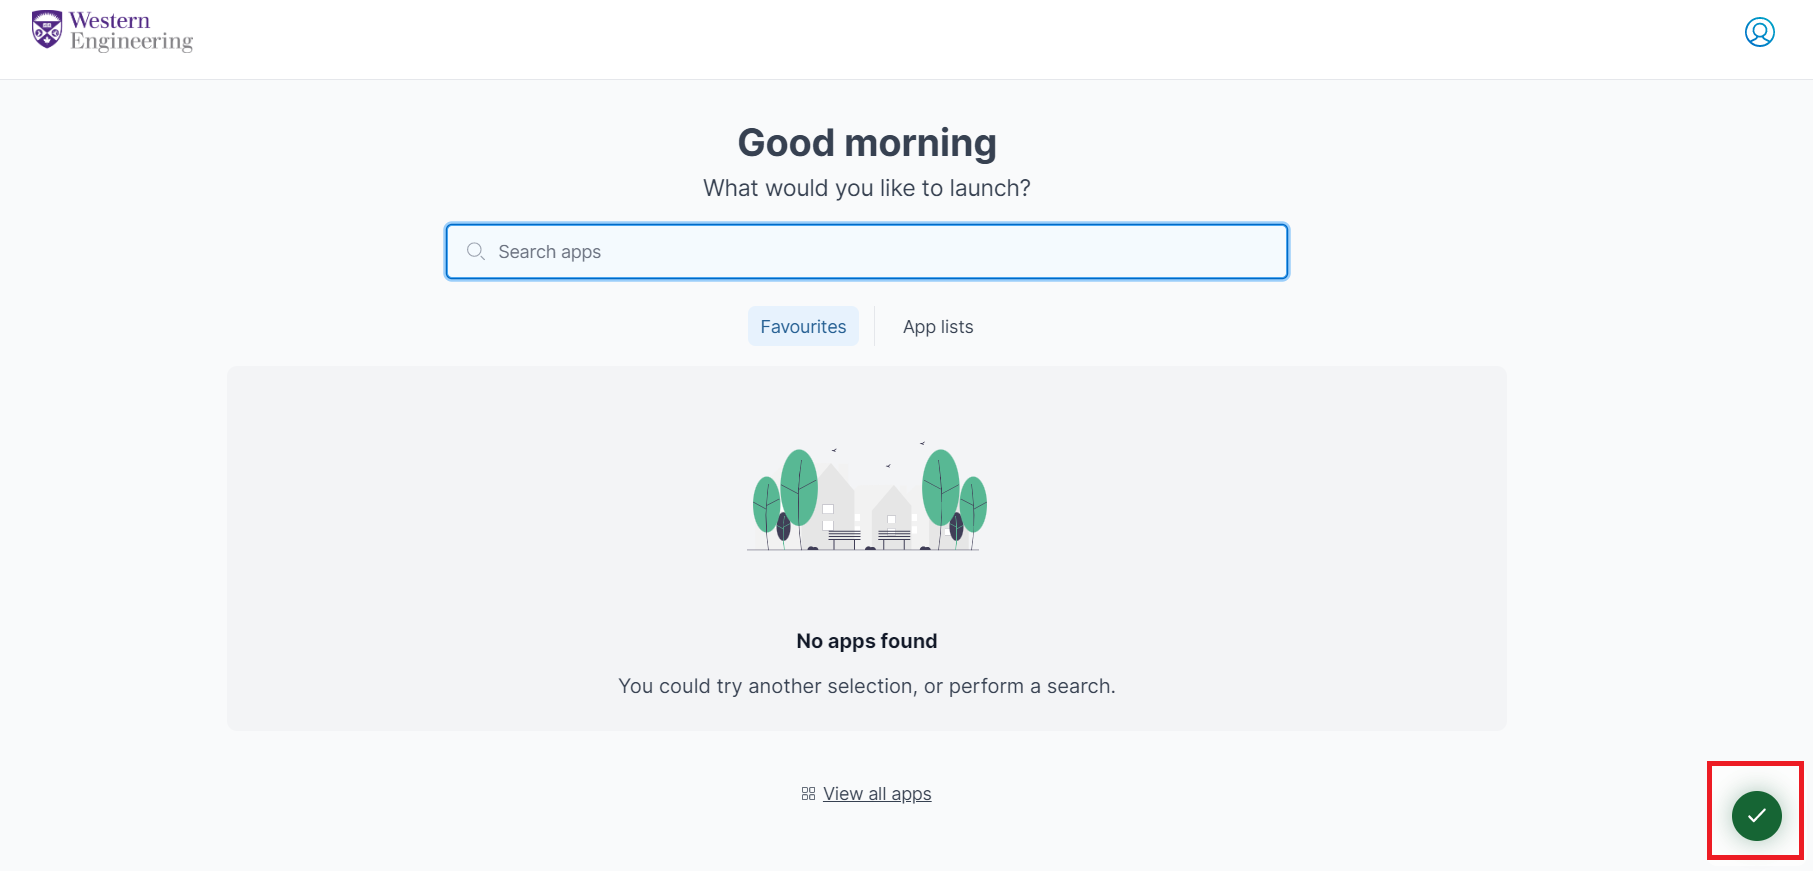
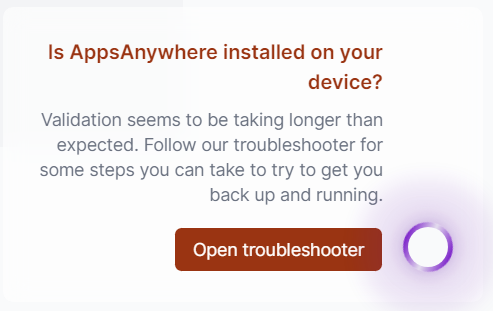
- When you see green arrow circle at the right bottom of the screen ( see in the above screenshot ), this means validation is successful and you're ready to launch software.
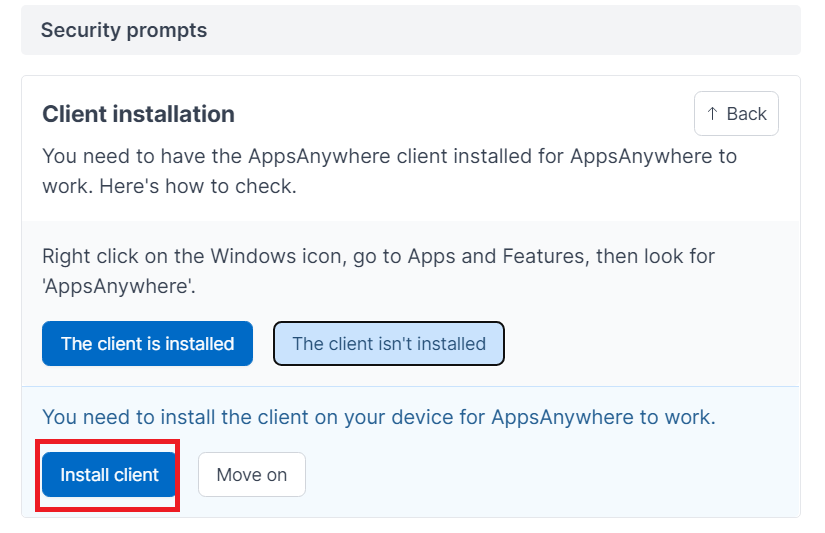
- If you see validation failed at the right bottom of the screen, click 'Open Troubleshooter' and answer the Security Prompts questions as shown in the below screenshots.
Step 5
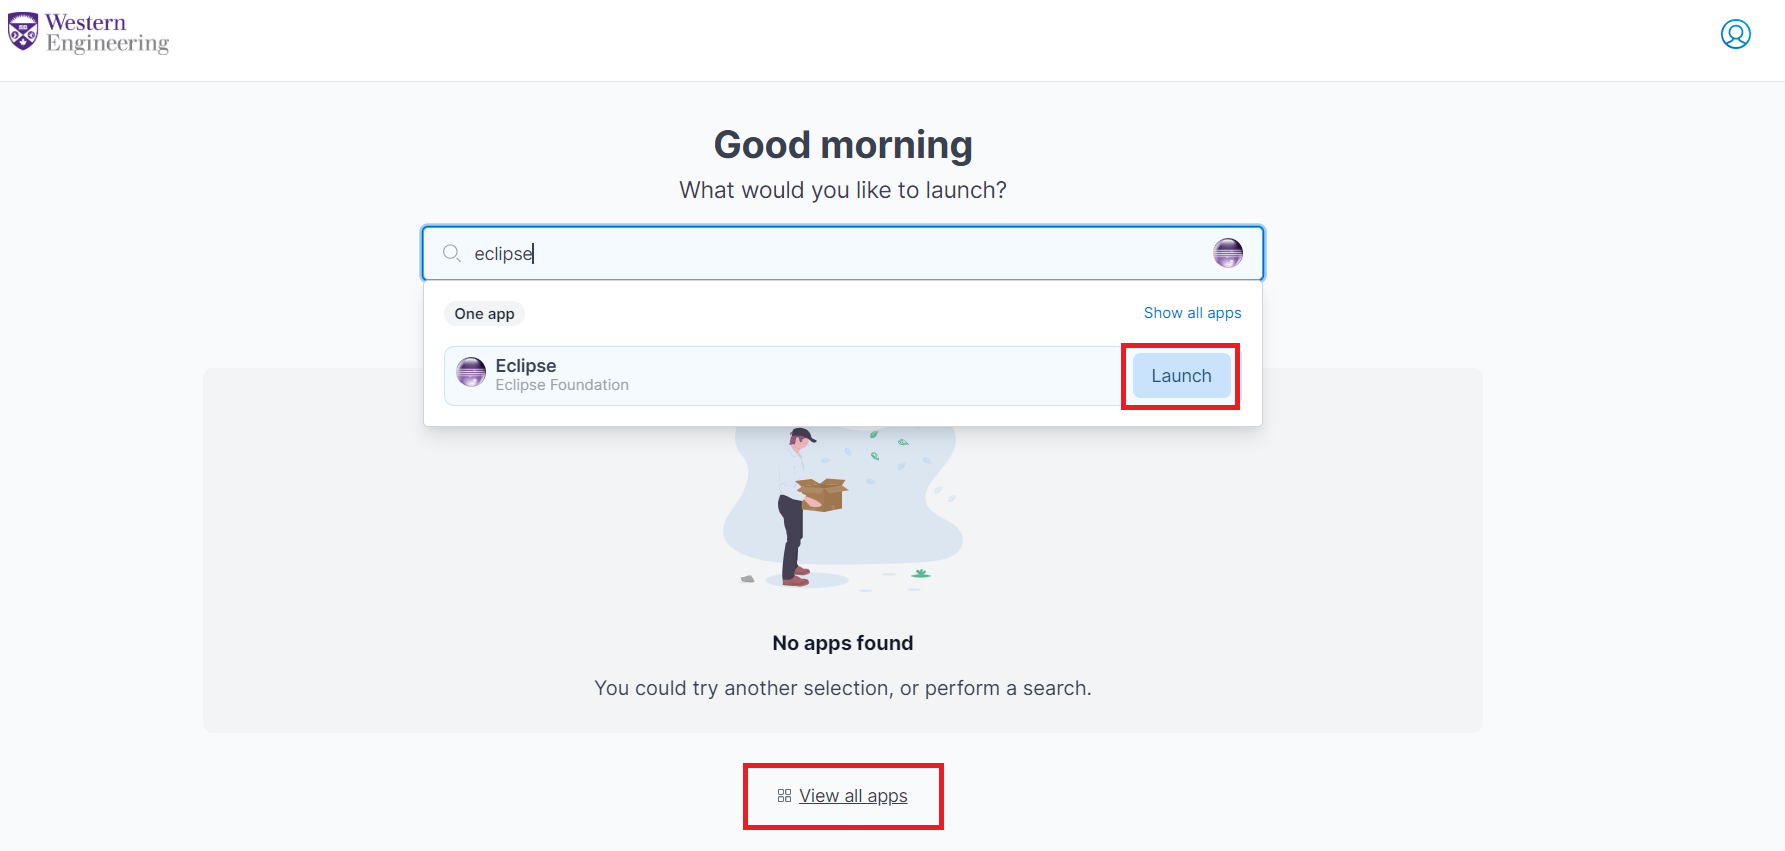
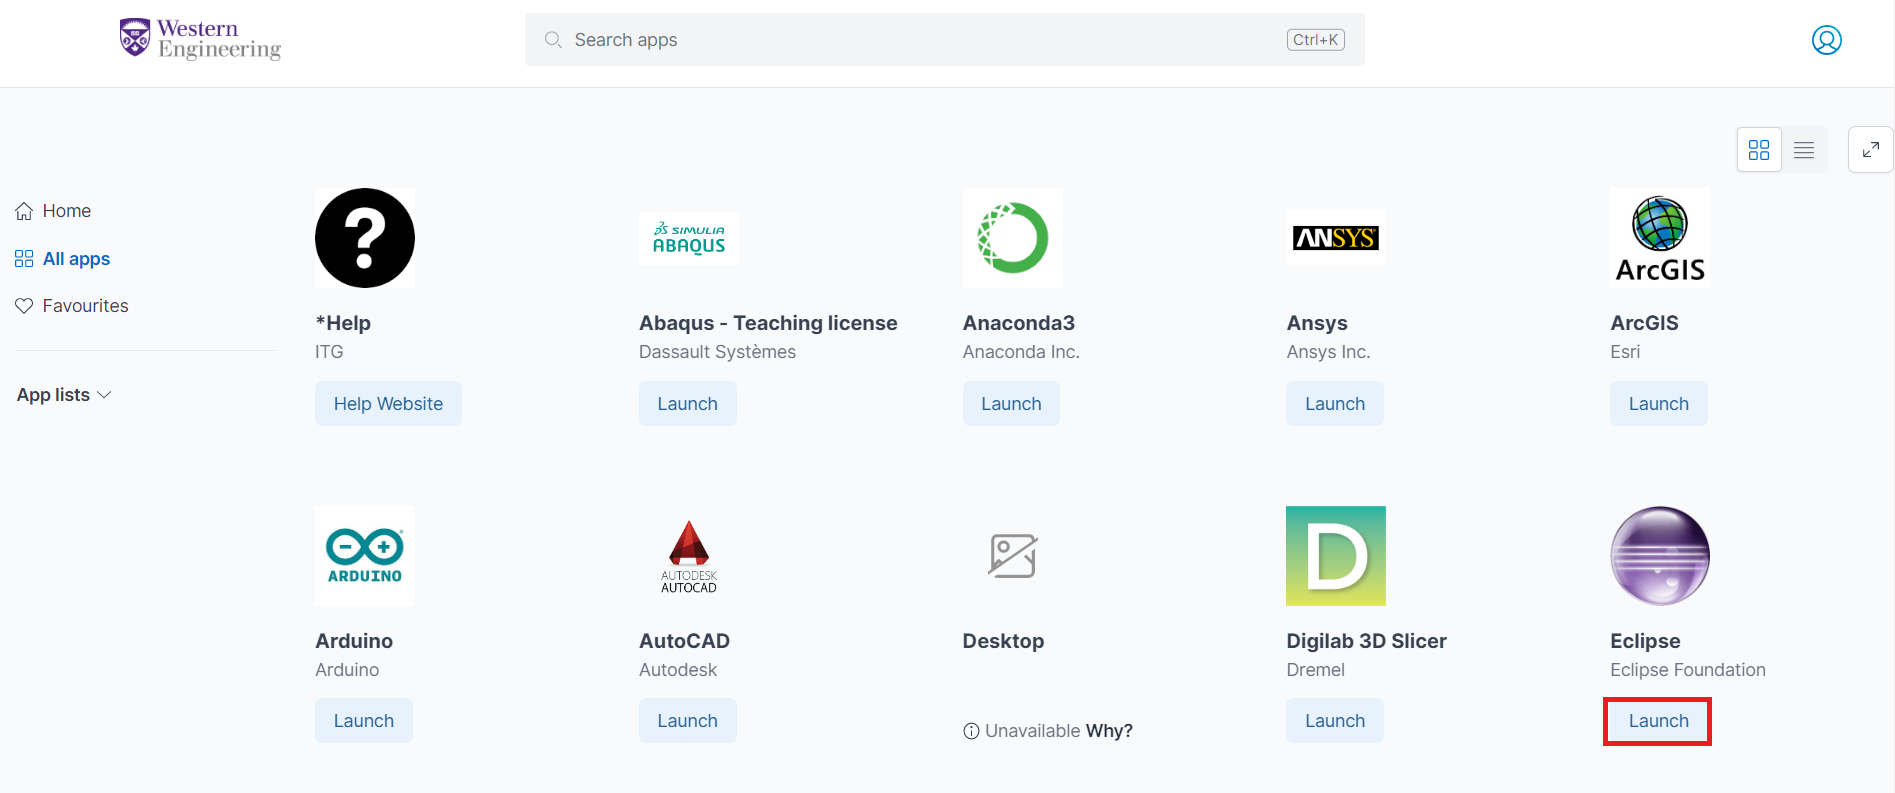
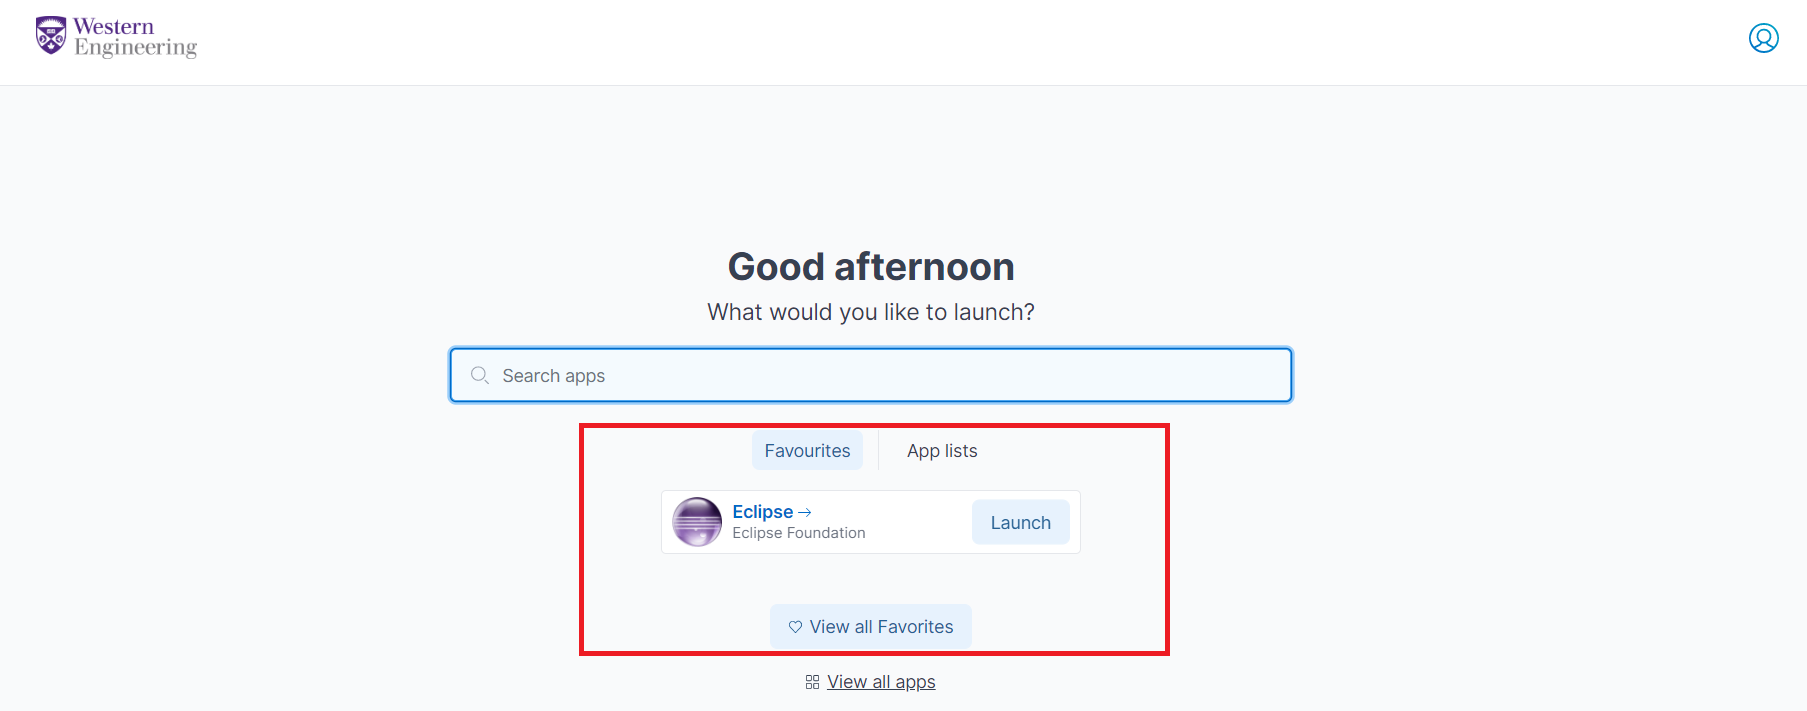
- You can search any software title and then click Launch. You can also click View all apps link as shown in the above screenshot.
- Click Launch to use a software on a personal/other device.
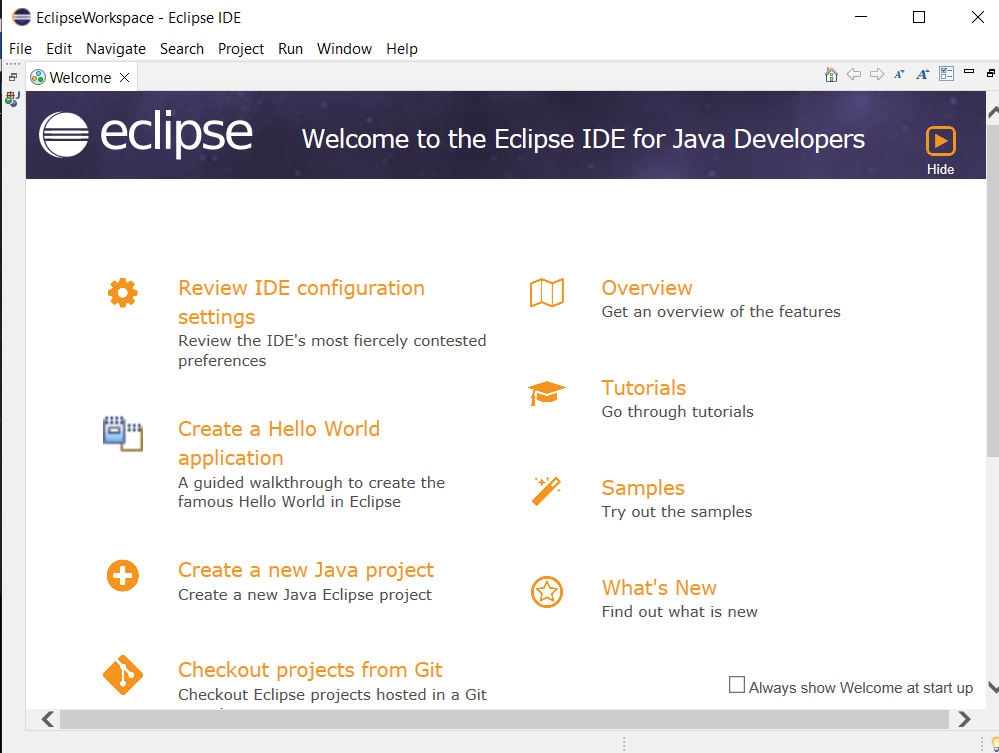
- Then software should start automatically as shown in the below screenshot.
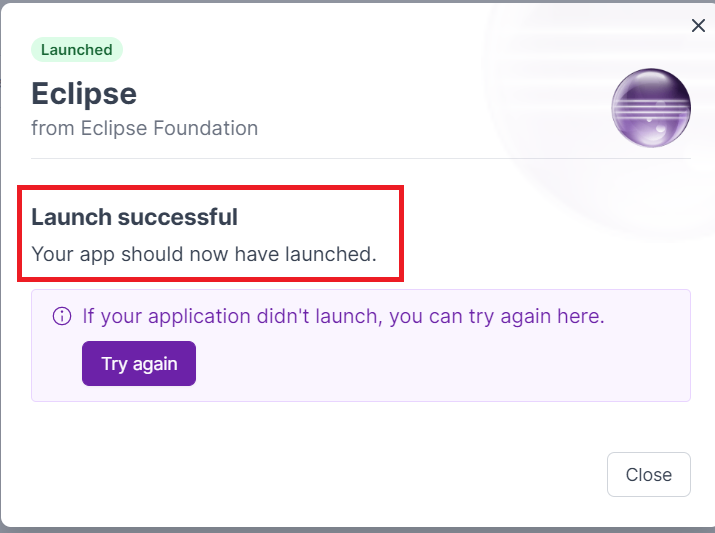
- If the software didn't launch, click Try again button in the above screenshot.
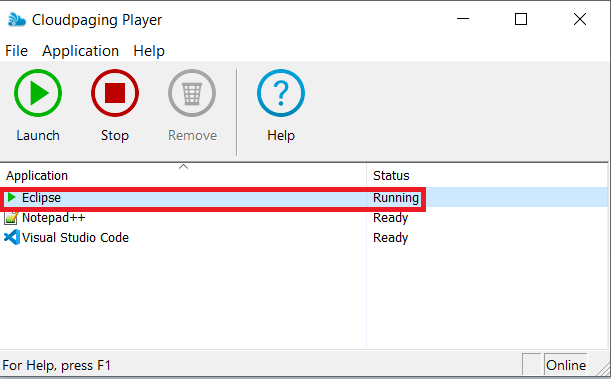
- You can also go to your Cloudpaging Player, select the software, and click on Launch, Stop or Remove button.
Launching Apps with AppsAnywhere
Step 1
- Visit appsanywhere.eng.uwo.ca
- If required, log in using Western WebLogin.
Step 2
- When you see green arrow circle, this means validation is successful and you're ready to launch software.
- If you see validation failed, click 'Open Troubleshooter' and answer the Security Prompts questions as shown in the below screenshots.
Step 3
- You can search any software title and then click Launch. You can also click View all apps link as shown in the above screenshot.
Step 4
- Click Launch to use a software on a personal/other device.
- Then software should start automatically as shown in the below screenshot.
- If the software didn't launch, click Try again button in the above screenshot.
- You can also go to your Cloudpaging Player, select the software, and click on Launch, Stop or Remove button.
Launching Apps with Cloudpaging Player
AppsAnywhere has two main components: the AppsAnywhere Application and the Cloudpaging Player. After launching applications from the Application, they are loaded and installed on the system and displayed in the Cloudpaging Player.
The status of a launch application will also be displayed. The different statuses that can be displayed are listed below with an explanation of what each status means.
Activating
During the activating stage, AppsAnywhere acquires authorization and information from the server for the application.
Prefetching
During the prefetching stage, the application’s files are being copied down to the local system.

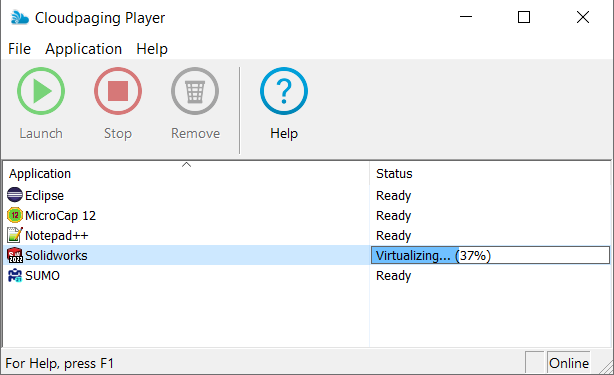
Virtualizing
During the virtualizing stage, the application’s files are being installed on the local system.
Authorizing
During the authorization stage, AppsAnywhere verifies that there is a valid license and seat available for the application.
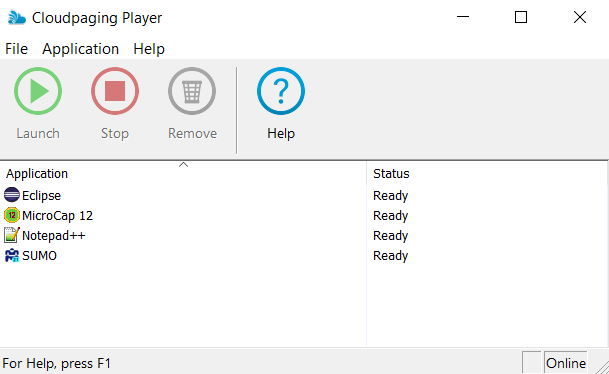
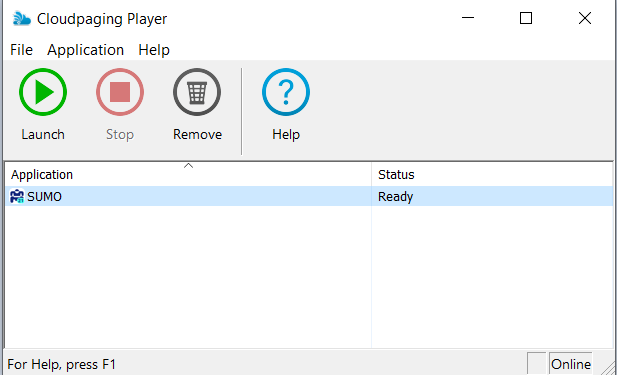
Ready
The ready status signifies that the application is installed and can be used.
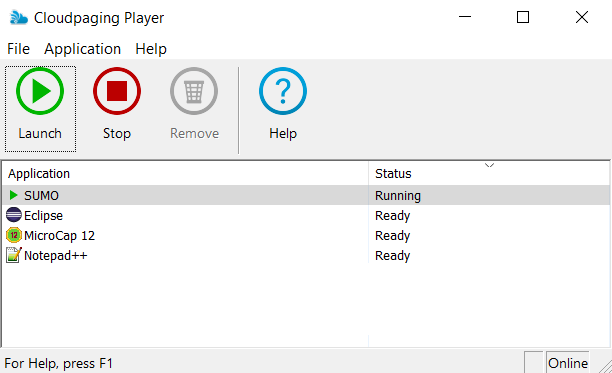
Running
The running status signifies that the application or that a service from the application is running. After exiting, some apps may still have a “Running” status if services from the app continue running in the background.
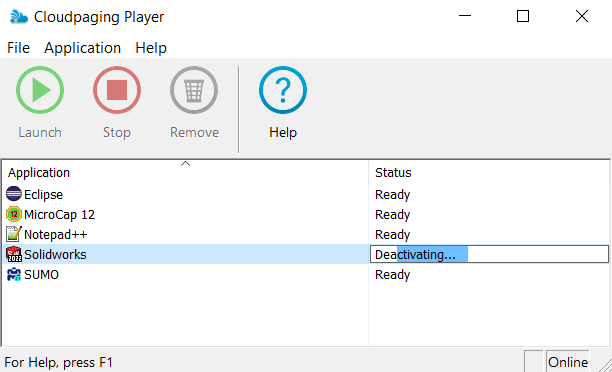
Deactivating
During the “Deactivating” stage, the application’s files are being uninstalled from the local system and the Cloud paging Player’s cache as well.
Tips:
- You will need Cloudpaging Player installed. If you haven't installed yet, please see the 'Installing Cloudpaging Player' tutorial in the first accordion tab.

- If you've already installed the Cloudpaging Player on your computer, you can click on the Start Menu to find your Cloudpaging Player.
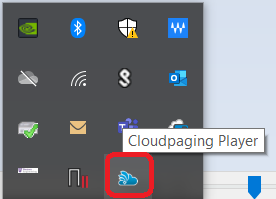
- You can also look for the Cloudpaging Player icon in the Windows system tray (near the clock).
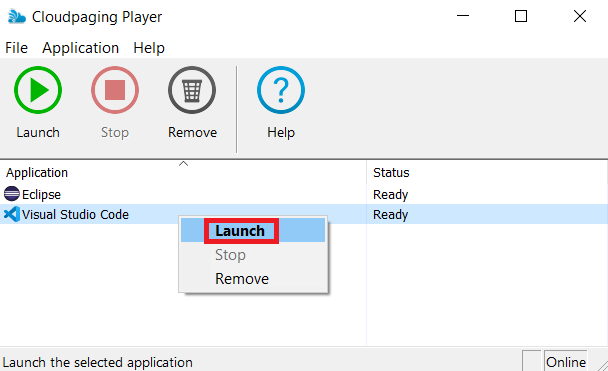
- When the CloudPaging Player appears, select one of the software that you've launched before.
- Then right-click with a mouse on a chosen software to Launch.
- The software should start automatically.
- If you want to remove a software, click Remove on CloudPaging Player. If the application is Running, you will need to click the red Stop button before clicking Remove.
Adding Favourites with AppsAnywhere
Step 1
- Visit appsanywhere.eng.uwo.ca
- If required, log in using Western WebLogin.
Step 2
- When you see green arrow circle at the right bottom of the page, this means validation is successful and you're ready to launch software.
Step 3
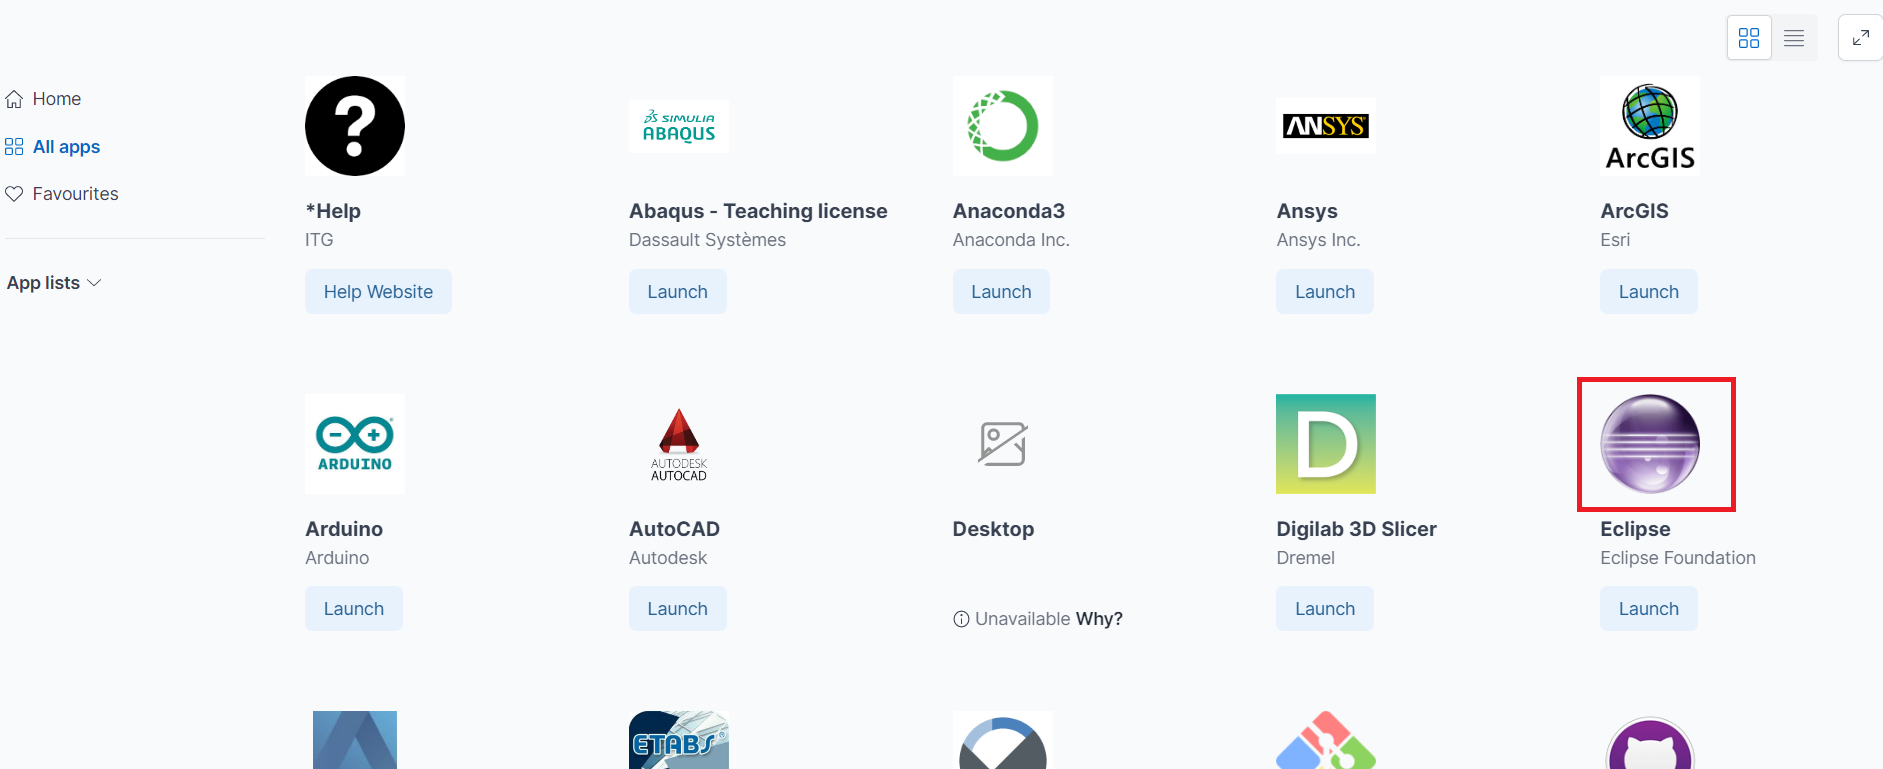
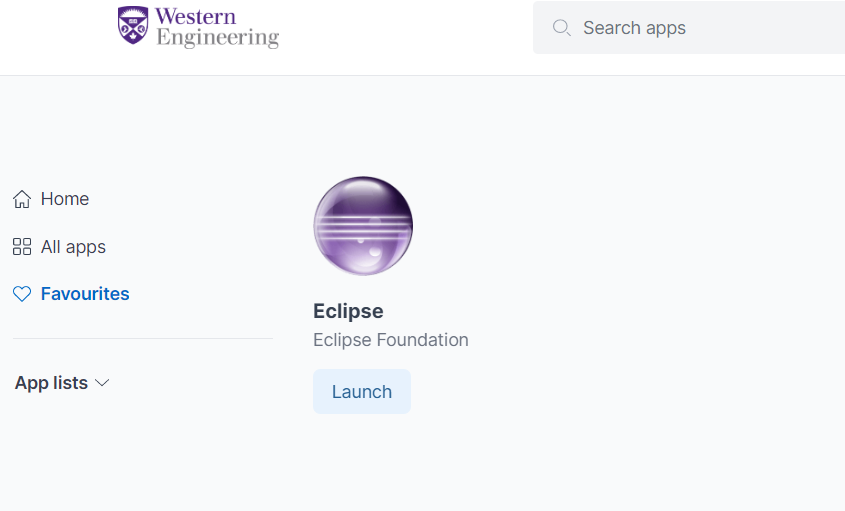
- You can search any software title and then click on App icon. You can also click View all apps at the bottom of the page as shown in the above screenshot.
Step 4
- Click on App icon.
- Then click Heart to add software into your favourites.
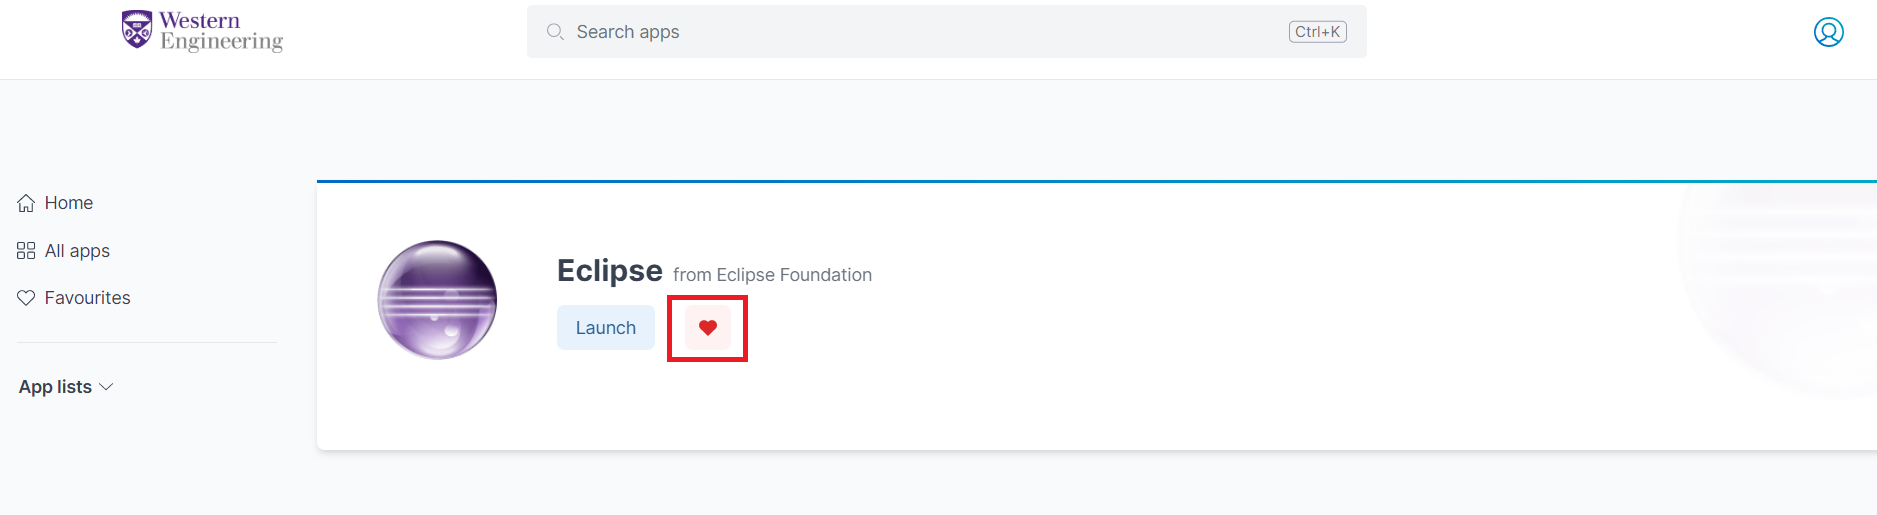
- You can see your favourites in Home or All apps pages as shown in the below screenshots.
Frequently Asked Questions
Why do some applications take longer to launch than others?
Some very large or complex applications, can take some time (perhaps several minutes) before they are ready to use. This is because the application has to pull down lots of information to the computer you are working on.
The launch time will be much better the second and subsequent times you launch the software on the same computer but each new computer you use will be treated as a first launch and take longer.
The experience will be better on the newer or more powerful computers. Also devices connected to a faster network will download and start applications with less delay.
How do I find the software I want to use?
After logging into the AppsAnywhere, use the search bar located at the center of the page to search for the apps title. If after searching you still can't find the application, please talk to your instructor or contact ITG.
How do I change the cache location of the application that is launched in my computer/laptop?
- Open Cloudpaging Player
- Go to File -> Options
- Select the Cache tab
- There you can change the cache location in your computer/laptop.
Why do I experience display issues in Ansys?
Ansys does not support UHD and 4K resolution displays. You can reduce the resolution (try 1920 x 1080) and then also adjust your windows scaling settings. Do not forget to reboot after making the resolution changes. Also try right-click on the ANSYS Product (Workbench in this case) shortcut and select Properties. Under Compatibility select Disable display scaling on high DPI settings.
How do I prevent the Cloudpaging Player running every time I start my computer?
By default the Cloudpaging Player will run in the background when Windows bootsup. If you want to prevent this and only run the player when you need it, follow these instructions:
Open the Cloudpaging Player.
Click File -> Options.
On the general tab, uncheck "Start Cloudpaging Player when Windows starts".
If you run Virtual (Parallels) apps on MAC and get the "aaparallels.eng.uwo.ca didn't send any data" error, what should you do?
If you run Virtual (Parallels) apps on MAC and get the "aaparallels.eng.uwo.ca didn't send any data" error, you should clear any cookies relating to appsanywhere.eng.uwo.ca or aaparallels.eng.uwo.ca and try again.
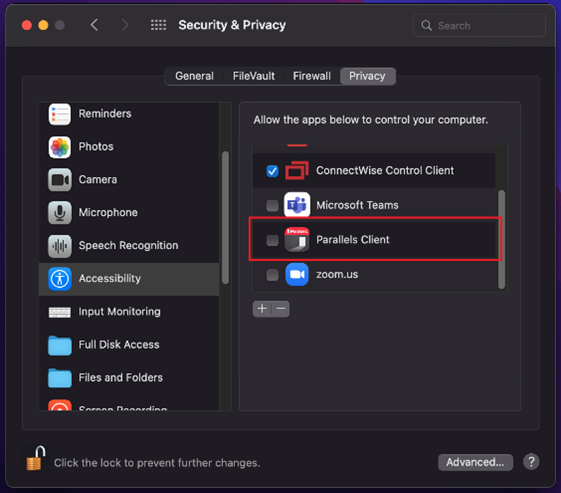
If you have trouble running applications through Parallels on your MAC device, what should you do?
If you have trouble running applications through Parallels on your MAC device, please ensure that the Parallels Client is allowed to control your computer. You check check/change the setting following the steps below:
Navigate to System Preferences > Security Privacy
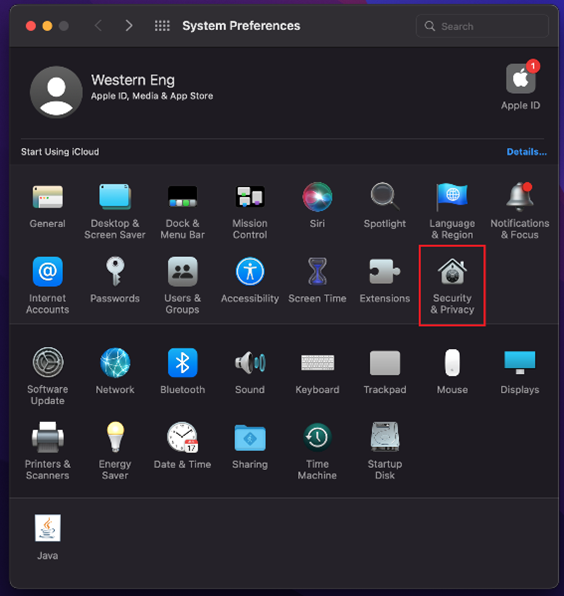
Under the Accessibility tab, make sure the Parallels Client box is checked. (You may need to click on the lock icon on the bottom left to allow changes to this menu).